
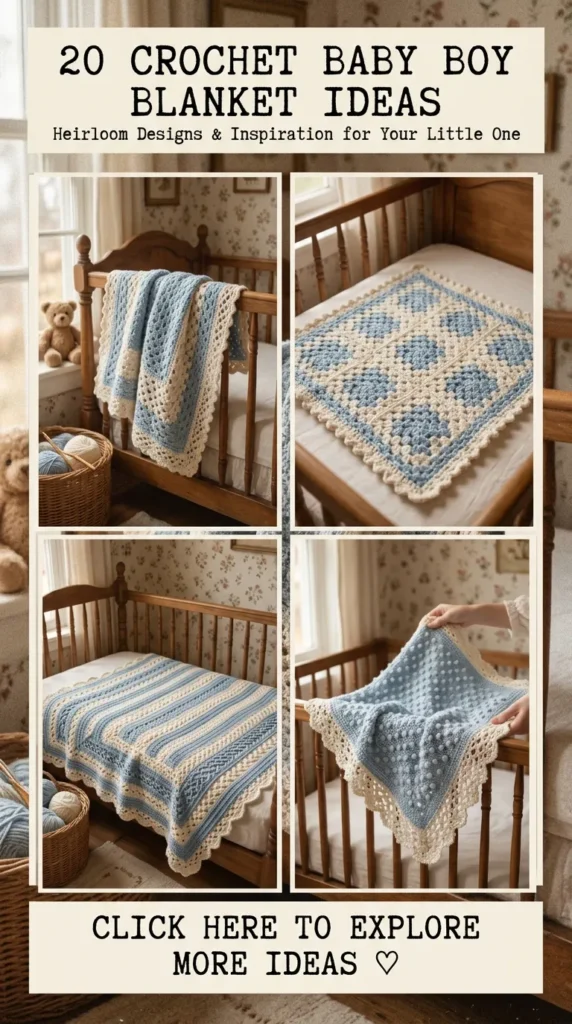
Creating a handmade blanket for a baby boy is one of the most rewarding ways to pour love, patience, and artistry into a keepsake that will be treasured for years. Modern nurseries have evolved far beyond basic blues, embracing sophisticated palettes of rich navy, sage green, warm oatmeal, charcoal grey, and earthy rust. A well-crafted crochet blanket serves not only as a functional source of warmth for stroller rides and crib naps but also as a stunning design statement that anchors the entire room decor.
Whether you are an experienced crafter looking to test complex cable structures or a beginner eager to master clean, minimalist textures, these 20 elegant crochet baby boy blanket ideas provide complete guidance. Explore detailed material lists, step-by-step instructions, pro tips, and design variations tailored to inspire your next masterpiece!



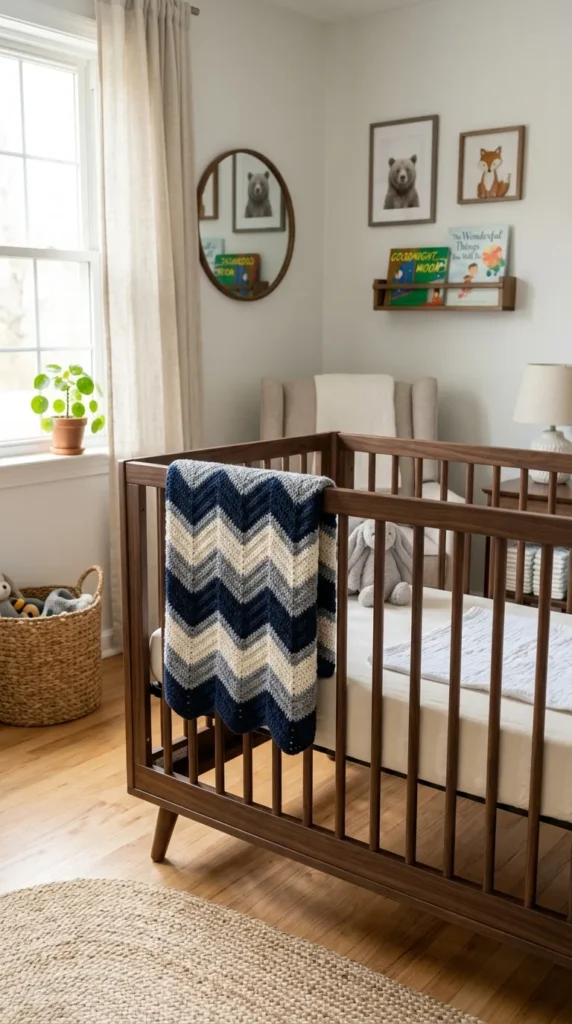
1. The Modern Navy and Slate Chevron Blanket
Brief Introduction
Sharp, graphic, and timelessly masculine, the Modern Navy and Slate Chevron Blanket introduces dynamic zig-zag waves in a sophisticated palette of deep nautical navy, cool slate grey, and crisp white.
What This Idea Means
The chevron (or ripple) stitch creates natural peaks and valleys that offer a rhythmic, meditative crochet experience while delivering a crisp, high-end geometric design that suits any modern nursery style.
What is Needed to Make That Thing
- Yarn: 4 skeins of DK-weight superwash merino wool (1 skein white, 2 skeins slate grey, 2 skeins navy).
- Hook Size: 4.5 mm (7) crochet hook.
- Notions: Tapestry needle and tape measure.
How to Make It
- Foundation Chain: Chain a multiple of the chevron pattern repeat plus turning chains to reach your desired blanket width (approx. 30 to 36 inches).
- Establishing the Ripple: Work rows of double crochet, incorporating strategic increases at the peaks and decreases at the valleys to form the zig-zag waves.
- Striping Sequence: Change colors every 2 rows to create clean, rhythmic horizontal chevron stripes.
- Length Adjustment: Continue repeating rows until the blanket reaches your desired rectangular length.
- Border: Add a clean single crochet border along the top and bottom edge to straighten the initial foundation and final row.
Tips and Variations
- Tip: Count your stitches carefully at the end of every single row—chevron increases and decreases are easy to miscount if distracted!
- Variation: Use a self-striping gradient yarn cake to let the zig-zags shift colors automatically without cutting yarn tails.
2. The Classic Cabled Aran Heirloom Blanket
Brief Introduction
Sophisticated and sculptural, the Classic Cabled Aran Heirloom Blanket showcases intricate braided cable stitches that mimic high-end heritage knitwear.
What This Idea Means
Crochet cables create thick, raised structural braids that offer exceptional warmth, heavy drape, and breathtaking visual elegance, turning a simple blanket into a true family heirloom.
What is Needed to Make That Thing
- Yarn: 5 to 6 skeins of premium merino wool or soft acrylic DK yarn in warm oatmeal or cream.
- Hook Size: 5.0 mm (H-8) crochet hook.
- Notions: Cable needle (optional) and tapestry needle.
How to Make It
- Foundation Row: Chain a width that incorporates your cable panel stitch repeats plus border stitches.
- Working Cable Stitches: Use front post treble crochets skipped and crossed over each other to create the raised cable braid effect.
- Border Panels: Frame the central cable panels with simple moss stitch or ribbed borders.
- Growing the Blanket: Repeat your cable cross rows until the blanket reaches your desired length.
- Blocking: Block the finished blanket carefully to make the cable braids pop with crisp definition.
Tips and Variations
- Tip: Cables are dense and heavy; choose a lightweight yarn like a bamboo-wool blend to keep the blanket comfortable for an infant.
- Variation: Use a rich heathered gray or oat colorway for a gender-neutral modern heirloom look.
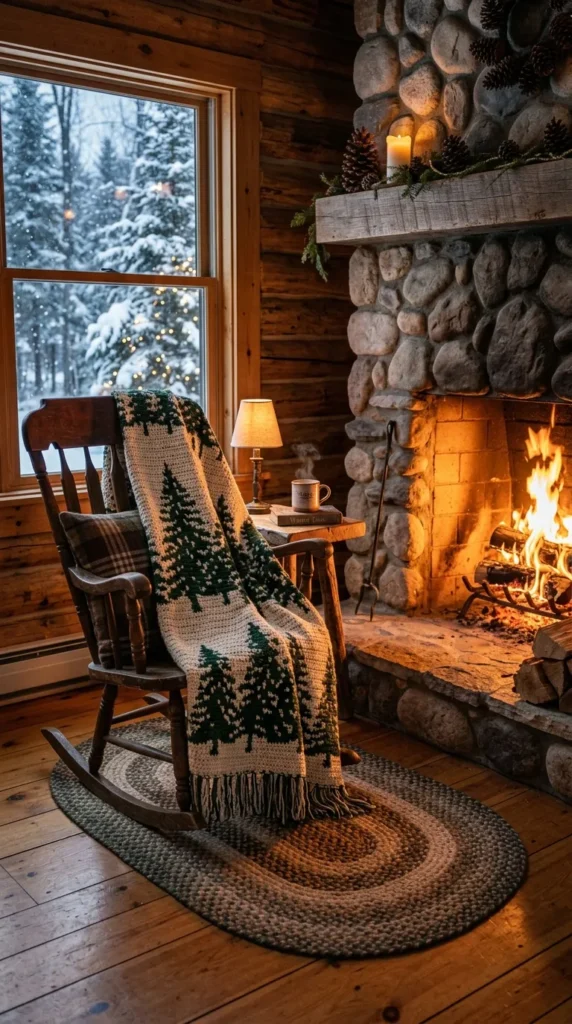
3. The Forest Pine Tree Tapestry Blanket
Brief Introduction
Embrace rustic cabin aesthetics with the Forest Pine Tree Tapestry Blanket, featuring geometric evergreen tree silhouettes worked directly into the fabric.
What This Idea Means
Using tapestry crochet techniques, you carry multiple colors across your rows to create clean, graphic nature motifs that look like traditional knitted heritage wear.
What is Needed to Make That Thing
- Yarn: 3 skeins of cream yarn and 2 skeins of deep forest green yarn.
- Hook Size: 4.5 mm (7) crochet hook.
- Notions: Tapestry needle.
How to Make It
- Chart Reading: Select a geometric pine tree grid chart.
- Tapestry Crochet: Work single crochet stitches, carrying the unused yarn color inside your stitches so it remains hidden until needed for color changes.
- Blanket Body: Follow your chart across the central rows while maintaining clean edges.
- Solid Framing: Frame the forest motifs with a solid forest green ribbed border.
- Finishing: Weave in all interior color tails securely.
Tips and Variations
- Tip: Keep your carried yarn loose enough that the fabric doesn’t pucker or bunch up.
- Variation: Add mountain peak motifs underneath the pine trees for a complete alpine landscape.
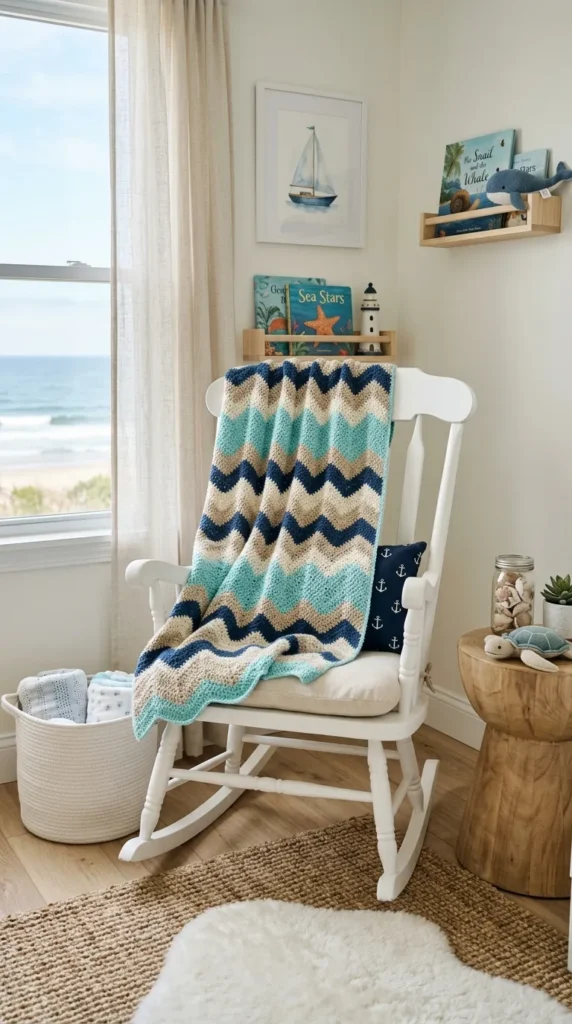
4. The Coastal Striped Ripple Blanket
Brief Introduction
Breezy, tranquil, and reminiscent of seaside shores, the Coastal Striped Ripple Blanket combines oceanic shades of turquoise, navy, sand, and seafoam.
What This Idea Means
This design celebrates calming water-inspired color theory, utilizing soft waves and harmonious coastal hues to create a peaceful nursery atmosphere.
What is Needed to Make That Thing
- Yarn: 4 skeins of DK baby yarn in coastal shades (navy, turquoise, sand, white).
- Hook Size: 4.0 mm (G-6) crochet hook.
- Notions: Tapestry needle.
How to Make It
- Foundation: Chain your desired width using the sand-colored yarn.
- Ripple Pattern: Establish a gentle wave pattern using half double crochets with skipped stitches in the valleys and multiple stitches in the peaks.
- Color Transition: Cycle through navy, turquoise, and white in block stripes of four rows each.
- Border Finish: Work a neat moss-stitch border around the entire perimeter.
- Blocking: Steam block gently to relax the ripples into smooth waves.
Tips and Variations
- Tip: Bamboo-cotton yarn adds a lovely cool drape that mimics the breezy feel of the coast.
- Variation: Use wider bands of sand-colored neutral yarn between narrow bands of bright blue.
5. The Masculine Waffle Thermal Blanket
Brief Introduction
Boasting incredible squishiness and depth, the Waffle Thermal Blanket creates a textured grid pattern that traps pockets of warm air while offering a rugged, tailored look.
What This Idea Means
The waffle stitch produces a thick, thermal fabric with a rich 3D texture that looks complex and professional while providing exceptional warmth for cold-weather walks.
What is Needed to Make That Thing
- Yarn: 5 skeins of worsted-weight wool or acrylic yarn in charcoal grey.
- Hook Size: 5.5 mm (I) crochet hook.
- Notions: Tapestry needle.
How to Make It
- Foundation Multiple: Chain a multiple of 3 plus 2 stitches for your starting width.
- Waffle Pattern Setup: Alternate front post double crochets and regular double crochets to establish the grid foundation.
- Building the Blanket: Continue working the waffle stitch pattern in rows until the blanket reaches square dimensions.
- Border: Finish the outer perimeter with three rounds of simple half double crochet.
- Final Weave: Securely weave in all starting and ending tails.
Tips and Variations
- Tip: Waffle stitch uses more yarn than basic stitches, so ensure you have an extra skein on hand.
- Variation: Use a rich denim blue yarn for a classic baby boy aesthetic.
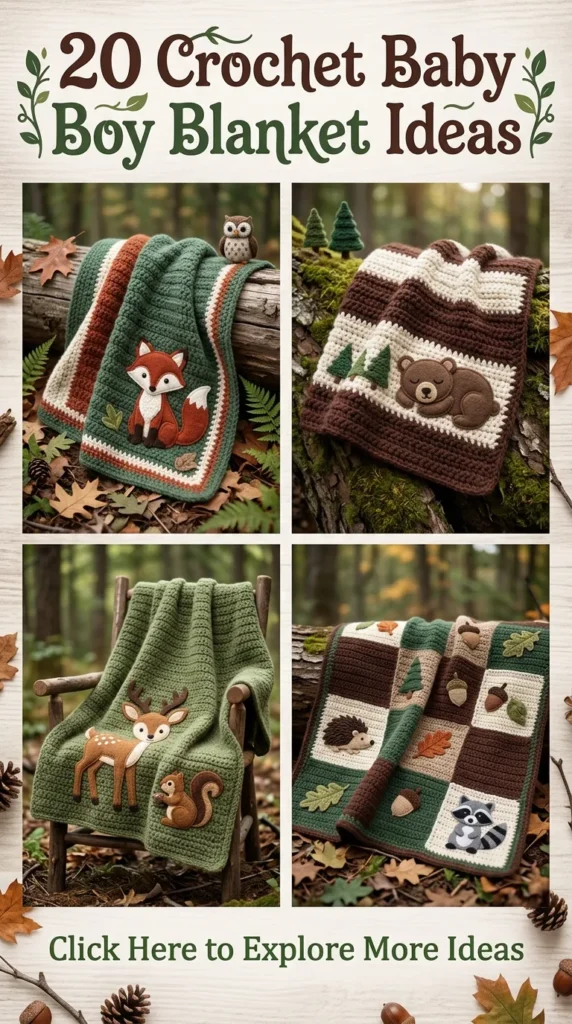
6. The Woodland Fox and Pine Motif Blanket
Brief Introduction
Charming and whimsical, this blanket combines textured stitch blocks with cute woodland creature accents for a rustic forest-themed nursery.
What This Idea Means
It brings the serenity of the great outdoors into baby’s room, utilizing earthy rust, cream, and forest green tones to create an inviting visual narrative.
What is Needed to Make That Thing
- Yarn: Worsted-weight yarn in burnt orange, cream, forest green, and dark brown.
- Hook Size: 5.0 mm (H-8) crochet hook.
- Notions: Tapestry needle and scissors.
How to Make It
- Panel Construction: Crochet individual panels featuring textured stitches like the bobble stitch or moss stitch.
- Appliqué Integration: Crochet small fox and pine tree appliqués separately.
- Attaching Motifs: Securely sew the appliqués onto designated panels using matching yarn.
- Panel Joining: Join all panels together using a flat braid join or simple whip stitch.
- Outer Edging: Add a clean, sturdy ribbed border around the entire blanket.
Tips and Variations
- Tip: Pin all appliqués in place before sewing to ensure balanced placement across the blanket layout.
- Variation: Swap foxes for little woodland bears or playful deer silhouettes.
7. The Buffalo Plaid Lumberjack Blanket
Brief Introduction
Cozy, rugged, and stylishly rustic, the Buffalo Plaid Lumberjack Blanket brings classic cabin plaid to the crib in bold blocks of black, red, and grey (or navy and blue).
What This Idea Means
Using color blending and intarsia techniques, this design creates an optical illusion of intersecting check patterns that look remarkably professional.
What is Needed to Make That Thing
- Yarn: Worsted-weight yarn in deep navy, royal blue, steel grey, and white (for a baby boy twist on traditional red).
- Hook Size: 5.0 mm (H-8) crochet hook.
- Notions: Multiple yarn bobbins and tapestry needle.
How to Make It
- Grid Planning: Map out your plaid color block chart.
- Intarsia Crochet: Switch colors frequently across rows, carrying or dropping bobbins to avoid thick yarn build-up on the back.
- Building the Checkers: Ensure color blocks align vertically and horizontally to form the distinct plaid squares.
- Border Trim: Finish with a solid navy single crochet border to frame the plaid pattern cleanly.
- Blocking: Block flat to set the checkered grid straight.
Tips and Variations
- Tip: Use yarn bobbins to keep your active colors from tangling while working rows.
- Variation: Stick to classic charcoal, heather grey, and crisp white for a minimalist modern plaid.

8. The Minimalist Modern Grid Blanket (Moss Stitch)
Brief Introduction
Sleek, minimalist, and ultra-drapey, the Minimalist Modern Grid Blanket uses the moss stitch (granite stitch) to create a subtle woven fabric appearance.
What This Idea Means
The moss stitch is renowned for its incredible drape and lack of heavy bulk, making it breathable yet cozy for a baby boy’s daily use.
What is Needed to Make That Thing
- Yarn: 4 skeins of DK cotton-blend yarn in oatmeal and charcoal.
- Hook Size: 5.0 mm (H-8) crochet hook.
- Notions: Tapestry needle.
How to Make It
- Foundation Chain: Chain an even number of stitches with oatmeal yarn.
- Moss Stitch Setup: Work [single crochet, chain 1, skip 1 stitch] across the row.
- Color Interlock: Change colors every 2 rows to form a subtle, elegant horizontal grid line pattern.
- Body Extension: Continue working moss stitch rows until the blanket reaches your desired square size.
- Border: Finish with a crisp charcoal single crochet border.
Tips and Variations
- Tip: Moss stitch works up quickly once you find your rhythm in the chain-1 spaces.
- Variation: Use variegated yarn for every second stripe to add a subtle watercolor effect.
9. The Velvet Chenille Cloud Blanket
Brief Introduction
Ultra-plush, velvety, and exceptionally soft, the Velvet Chenille Cloud Blanket wraps your baby boy in a cloud-like texture that feels heavenly against the skin.
What This Idea Means
Utilizing jumbo or bulky chenille velvet yarn, this blanket works up remarkably fast and creates a sensory-rich tactile experience.
What is Needed to Make That Thing
- Yarn: 4 skeins of super bulky velvet yarn in dusty blue or silver grey.
- Hook Size: 8.0 mm (L-11) crochet hook.
- Notions: Tapestry needle and fabric glue (for securing chenille ends).
How to Make It
- Foundation Chain: Chain loosely to your desired blanket width.
- Simple Stitches: Work in basic half double crochet rows—velvet yarn shows off plush beauty best with simple stitches.
- Tension Control: Keep your tension even and relaxed to ensure the blanket remains drapey and flexible.
- Border Edges: Work a final round of single crochet around the perimeter for a clean frame.
- Securing Ends: Tie off and secure chenille yarn tails with a tiny dab of fabric glue to prevent slipping.
Tips and Variations
- Tip: Chenille yarn hides individual stitches; rely on touch and stitch markers to keep your row counts accurate.
- Variation: Combine two contrasting velvet colors for a bold, modern striped cloud blanket.
10. The Nautical Anchor and Waves Blanket
Brief Introduction
Charming and oceanic, this blanket features textured wave rows capped with a bold central anchor appliqué for a classic nautical nursery theme.
What This Idea Means
It captures maritime adventure and classic sailor style, using crisp navy, white, and red accent lines to create a clean, storybook aesthetic.
What is Needed to Make That Thing
- Yarn: Worsted-weight cotton yarn in navy blue, bright white, and crimson red.
- Hook Size: 4.5 mm (7) crochet hook.
- Notions: Tapestry needle and scissors.
How to Make It
- Wave Body: Crochet the main blanket body using textured wave or ripple stitch rows in alternating navy and white.
- Anchor Appliqué: Crochet a separate detailed anchor motif using white yarn and red thread accents.
- Attaching the Anchor: Sew the anchor securely onto the center of the blanket.
- Border: Add a bold red single crochet trim around the outer edge for a sharp pop of contrast.
- Finishing: Weave in all loose ends.
Tips and Variations
- Tip: Cotton yarn ensures the blanket holds its shape well and is easy to machine wash.
- Variation: Replace the anchor with a cute steering wheel or sailboat motif.
11. The Modern Colorblock Striped Blanket
Brief Introduction
Clean, graphic, and boldly modern, the Modern Colorblock Striped Blanket features broad, balanced bands of muted blue, mustard yellow, sage green, and cream.
What This Idea Means
Colorblocking creates a dramatic, high-impact visual split that highlights modern design sensibilities and allows you to incorporate multiple favorite nursery shades.
What is Needed to Make That Thing
- Yarn: 1 skein each of 4 complementary DK yarns (muted blue, mustard, sage, cream).
- Hook Size: 5.0 mm (H-8) crochet hook.
- Notions: Tapestry needle.
How to Make It
- Block One: Start with cream yarn, working 15 rows of half double crochet.
- Color Transition: Cleanly cut and join muted blue yarn, working 15 rows.
- Continuing Blocks: Repeat for sage green and mustard yellow until the blanket reaches your desired length.
- Border: Finish the entire perimeter with a clean cream single crochet border to tie the blocks together.
- Weaving: Securely weave in all color transition ends.
Tips and Variations
- Tip: When changing colors, weave your yarn tails along the side edges as you work the border to save time.
- Variation: Add thin black pinstripe separator rows between each major color block.
12. The Little Gentleman Bowtie & Suspenders Blanket
Brief Introduction
Dapper and adorable, this unique blanket design incorporates crocheted suspender straps and a charming 3D bowtie right into the center design.
What This Idea Means
It brings playful formalwear charm to baby boy nursery decor, making it an incredible photo prop and a memorable baby shower gift.
What is Needed to Make That Thing
- Yarn: Worsted-weight yarn in crisp white (shirt base), charcoal grey (pants/suspenders), and navy blue (bowtie).
- Hook Size: 4.0 mm (G-6) crochet hook.
- Notions: Tapestry needle and small buttons.
How to Make It
- Shirt Base: Crochet a solid white blanket body using half double crochet stitches.
- Suspenders: Crochet two long grey vertical straps and sew them running down from the top edge.
- Bowtie Construction: Crochet a small 3D bowtie in navy blue.
- Assembly: Sew the bowtie securely at the top center between the suspender straps.
- Border: Frame the entire blanket with a charcoal grey ribbed border.
Tips and Variations
- Tip: Ensure the bowtie is securely anchored down so it withstands baby pulling and washing.
- Variation: Use tweed yarn for the suspenders to give them a realistic fabric texture.
13. The Starburst Mosaic Crochet Blanket
Brief Introduction
Geometric, mesmerizing, and intricate, the Starburst Mosaic Crochet Blanket creates striking optical illusion patterns without requiring complex mid-row color changes.
What This Idea Means
Mosaic crochet uses dropped stitches and single/double crochet combinations to build stunning geometric starbursts that look remarkably advanced while being approachable to learn.
What is Needed to Make That Thing
- Yarn: 3 skeins of dark navy yarn and 2 skeins of ice blue yarn.
- Hook Size: 5.0 mm (H-8) crochet hook.
- Notions: Tapestry needle.
How to Make It
- Mosaic Chart: Follow a geometric mosaic starburst chart, working two rows per color before switching.
- Dropped Stitches: Drop working yarn and use front-loop/back-loop mechanics to let colors cascade down into lower rows.
- Blanket Body: Continue repeating the mosaic chart until the desired blanket length is achieved.
- Envelope Border: Finish with a clean double-thick envelope border to lock in all edge strands.
- Blocking: Block flat to ensure the geometric mosaic lines pop cleanly.
Tips and Variations
- Tip: Mosaic crochet creates a thick, double-sided fabric that is exceptionally warm and cozy.
- Variation: Use high-contrast charcoal and cream for a dramatic modern graphic look.
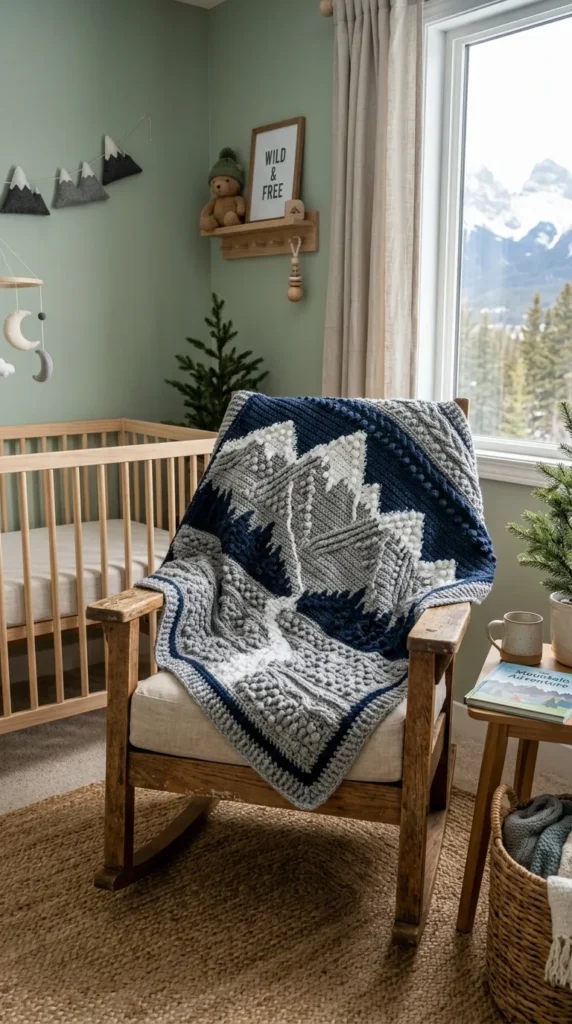
14. The Mountain Peaks Textured Blanket
Brief Introduction
Rugged and adventurous, the Mountain Peaks Textured Blanket uses raised post stitches to recreate jagged alpine mountain ranges across the blanket face.
What This Idea Means
This design celebrates outdoor adventure and exploration, using structural relief stitches to give the fabric a tactile, 3D mountain landscape feel.
What is Needed to Make That Thing
- Yarn: Worsted-weight yarn in heather grey, snow white, and midnight blue.
- Hook Size: 5.0 mm (H-8) crochet hook.
- Notions: Tapestry needle.
How to Make It
- Base Rows: Crochet a solid foundation of single crochet in midnight blue.
- Mountain Shaping: Use front post double crochets angled together to form triangular mountain peak shapes in white and grey.
- Valley Filling: Fill in the background valleys with textured moss stitch rows.
- Repeating Ranges: Work two full ranges of mountain peaks across the blanket height.
- Border: Frame the entire alpine scene with a clean midnight blue border.
Tips and Variations
- Tip: Keep your post stitch tension relaxed so the fabric doesn’t curl inward.
- Variation: Add a snow-capped white tip to each mountain peak for extra detail.



15. The Deep Space Galaxy Gradient Blanket
Brief Introduction
Mysterious and inspiring, the Deep Space Galaxy Gradient Blanket shifts smoothly from deep midnight black through rich indigo and violet to sparkling starlight white.
What This Idea Means
This blanket acts as a wearable canvas for celestial color theory, utilizing fading yarn cakes to create a seamless cosmic color transition.
What is Needed to Make That Thing
- Yarn: One full gradient yarn cake (approx. 1000 yards, DK or worsted weight) in galaxy tones.
- Hook Size: 4.5 mm (7) crochet hook.
- Notions: Tapestry needle.
How to Make It
- Start at Center: Begin at one end of the gradient cake with midnight black, working in half double crochet rows.
- Gradual Shift: Let the yarn naturally transition through indigo and deep violet as you work upward.
- Finishing Edge: Complete the final rows with the lightest starlight silver or white section of the gradient.
- Border: Add a simple slip-stitch border in matching black yarn.
- Weaving Ends: Secure all transition tails along the interior wrong side.
Tips and Variations
- Tip: Wind your gradient cake carefully to ensure you start from the correct end of the color spectrum.
- Variation: Sprinkle metallic silver embroidery stars across the dark sections for a true night-sky effect.
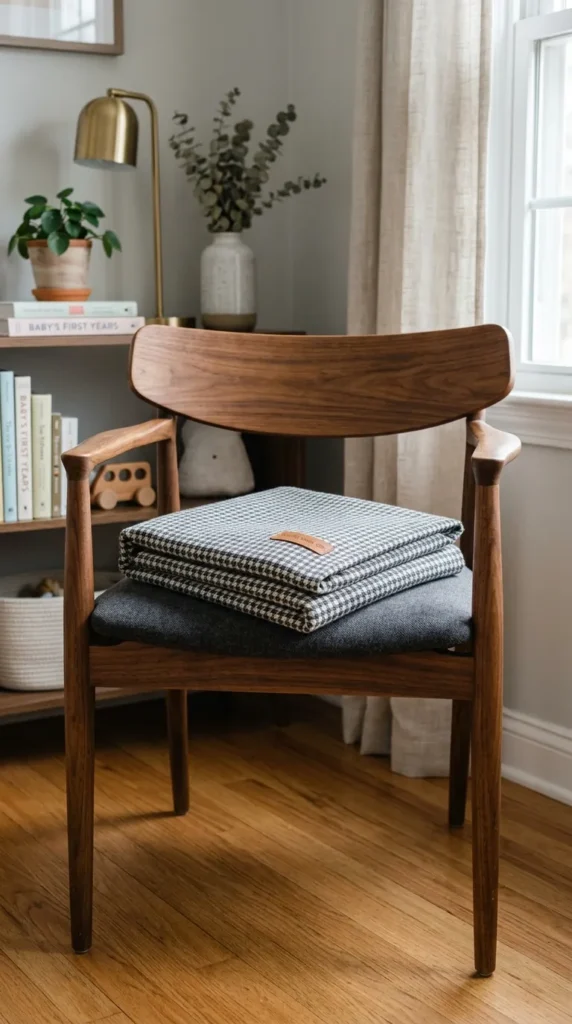
16. The Polished Houndstooth Baby Blanket
Brief Introduction
Classic, tailoring-inspired, and impeccably neat, the Polished Houndstooth Baby Blanket brings sophisticated menswear patterns into the nursery.
What This Idea Means
Houndstooth colorwork creates a sharp, interlocking two-tone check pattern that looks exceptionally high-end, crisp, and timelessly stylish.
What is Needed to Make That Thing
- Yarn: 4 skeins of DK baby yarn (2 skeins charcoal grey, 2 skeins crisp white).
- Hook Size: 4.0 mm (G-6) crochet hook.
- Notions: Tapestry needle.
How to Make It
- Houndstooth Pattern: Work alternating single crochets and double crochets, dropping and carrying yarns across rows to form the classic jagged houndstooth check.
- Maintaining Tension: Keep your carried floats consistent so the pattern remains even across the blanket.
- Growing the Check: Continue repeating the 2-row houndstooth sequence until the blanket is square.
- Solid Border: Frame the patterned center with three solid rounds of charcoal single crochet.
- Blocking: Steam block the blanket to flatten the tailored houndstooth fabric.
Tips and Variations
- Tip: Houndstooth creates a dense fabric; choose a lightweight yarn so the blanket stays flexible.
- Variation: Use navy blue and cream for a softer, warmer take on traditional houndstooth.
17. The Rustic Linen Stitch Tweed Blanket
Brief Introduction
Textured, organic, and resembling high-end tweed fabric, the Rustic Linen Stitch Tweed Blanket combines earthy speckles of wool for an artisanal aesthetic.
What This Idea Means
The linen stitch (also known as the moss or granite stitch) combined with tweed yarn creates a woven fabric look that is durable, lightweight, and deeply charming.
What is Needed to Make That Thing
- Yarn: 4 skeins of tweed worsted-weight yarn in oatmeal with subtle blue and green flecks.
- Hook Size: 5.5 mm (I) crochet hook.
- Notions: Tapestry needle.
How to Make It
- Foundation: Chain an odd number of stitches.
- Linen Stitch: Work [single crochet, chain 1, skip 1] across the row, working into the chain spaces on subsequent rows.
- Building Tweed: Let the tweed yarn’s natural multi-color flecks create the pattern organically without changing yarn skeins.
- Blanket Square: Continue working linen rows until square.
- Border: Add a simple crab-stitch (reverse single crochet) border for a neat, finished edge.
Tips and Variations
- Tip: Tweed yarn adds built-in texture, meaning simple stitches look exceptionally rich and professional.
- Variation: Add a solid leather tag labeled “Handmade” to the corner for a boutique finish.
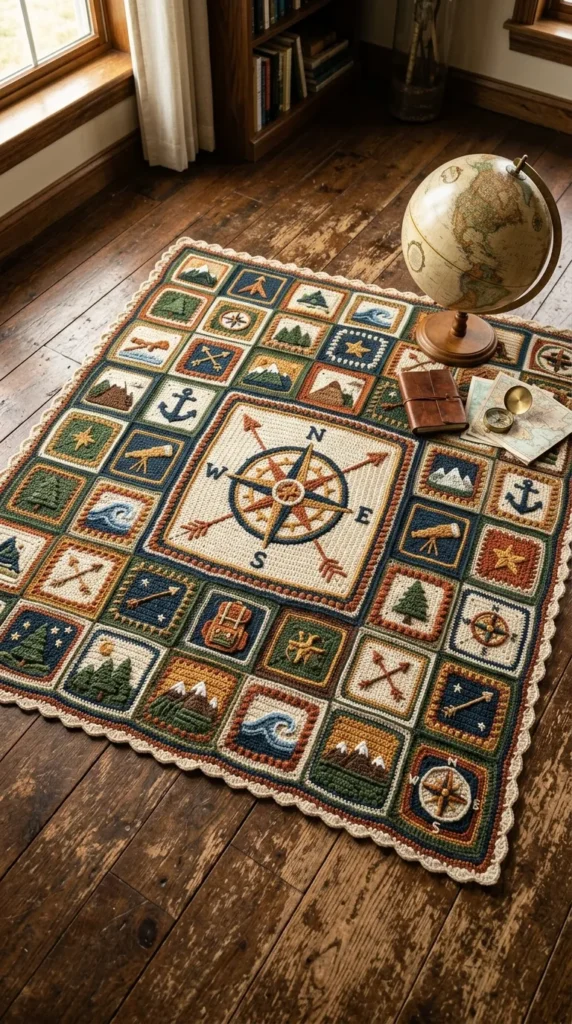
18. The Explorer Compass Square Blanket
Brief Introduction
Adventurous and symbolic, the Explorer Compass Square Blanket features a stunning central compass rose motif surrounded by structured geometric borders.
What This Idea Means
It celebrates a life of travel and discovery, using overlay crochet and square granny techniques to create a striking nautical navigation centerpiece.
What is Needed to Make That Thing
- Yarn: Worsted-weight yarn in navy, denim blue, cream, and mustard.
- Hook Size: 4.5 mm (7) crochet hook.
- Notions: Tapestry needle and blocking pins.
How to Make It
- Center Compass: Crochet a circular or square compass rose motif for the center using overlay crochet techniques.
- Expanding Squares: Build surrounding geometric rounds in navy and denim blue to turn the center into a large square block.
- Border Rounds: Add textured post-stitch border rounds to frame the compass design.
- Blocking: Pin and steam block the large square so it lies perfectly flat.
- Final Trim: Finish with a clean single crochet edge.
Tips and Variations
- Tip: Block your center square thoroughly before adding outer rounds to prevent warping.
- Variation: Use mustard yellow for the compass needle to make it stand out sharply against the blue background.
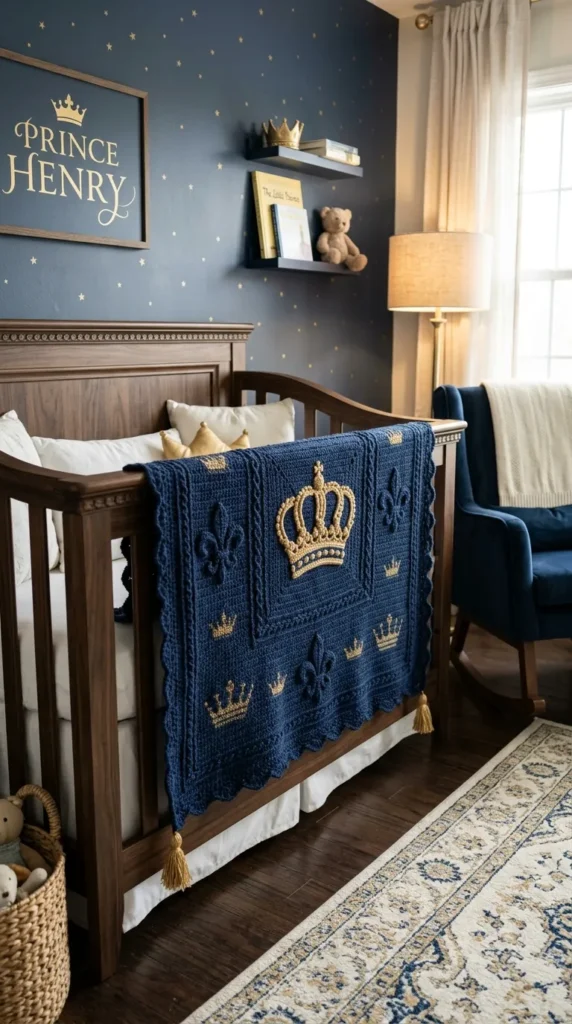
19. The Royal Crown Textured Blanket
Brief Introduction
Regal, sophisticated, and plush, the Royal Crown Textured Blanket features raised post-stitch crests that resemble royal crowns and heraldic shields.
What This Idea Means
This design brings subtle majesty to a baby boy’s room, utilizing rich jewel tones like deep navy, forest green, and gold accents to create an opulent nursery centerpiece.
What is Needed to Make That Thing
- Yarn: 5 skeins of DK merino wool in deep navy, plus a small amount of metallic gold yarn.
- Hook Size: 4.5 mm (7) crochet hook.
- Notions: Tapestry needle.
How to Make It
- Foundation: Chain your desired blanket width in deep navy.
- Crown Motifs: Use front post treble crochets and bobble stitches to create repeating crown and shield relief patterns across rows.
- Gold Accents: Weave subtle gold metallic thread through the peaks of the crown motifs for a touch of royalty.
- Blanket Body: Repeat pattern rows until the blanket reaches your desired dimensions.
- Border: Frame the blanket with a sturdy ribbed border.
Tips and Variations
- Tip: Metallic thread can be slightly scratchy; use it only as a surface accent rather than main stitches to maintain softness.
- Variation: Use deep emerald green instead of navy for a rich, regal forest look.
20. The Vintage Aviation Airplane Blanket
Brief Introduction
Nostalgic and charming, the Vintage Aviation Airplane Blanket features adorable flying airplane appliqués soaring across a soft sky-blue background.
What This Idea Means
It captures the wonder of vintage flight and adventure, turning a cozy blanket into a delightful storybook narrative for a baby boy’s nursery.
What is Needed to Make That Thing
- Yarn: Worsted-weight yarn in sky blue (sky base), white (clouds), and red/grey (airplanes).
- Hook Size: 5.0 mm (H-8) crochet hook.
- Notions: Tapestry needle and scissors.
How to Make It
- Sky Background: Crochet the main blanket body in solid sky-blue half double crochet rows.
- Cloud Motifs: Crochet fluffy white cloud appliqués and sew them across the upper background.
- Airplane Appliqués: Crochet vintage airplane motifs with propeller and wing details.
- Arranging Flight Paths: Sew the airplanes onto the blanket as if they are soaring through the clouds, optionally embroidering dotted flight paths behind them.
- Border: Add a clean white single crochet border to frame the entire aviation scene.
Tips and Variations
- Tip: Use lightweight cotton yarn for appliqués so they lay flat against the blanket surface.
- Variation: Add miniature wooden buttons as airplane wheels for a fun 3D tactile element.
Conclusion
Crocheting a handmade blanket for a baby boy is an incredible journey of creativity and affection. Whether you choose the sharp geometry of a modern chevron, the cozy warmth of a cabled heirloom, or the playful charm of aviation appliqués, these 20 elegant ideas offer endless inspiration for your next nursery project. Grab your favorite hook, select your luxurious yarn palette, and start stitching a treasured keepsake today!

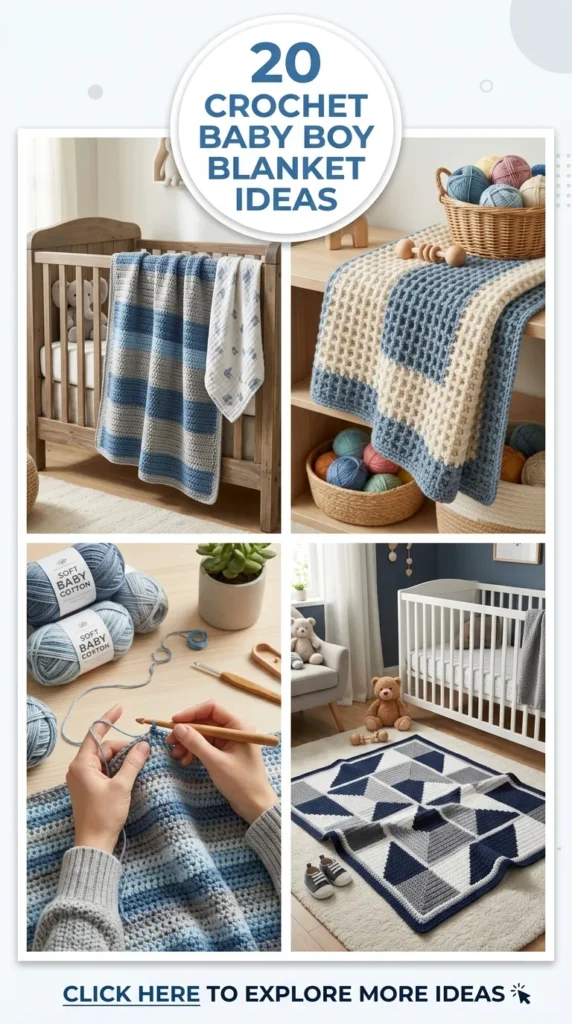



more ideas to come in future addition